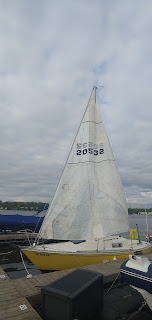
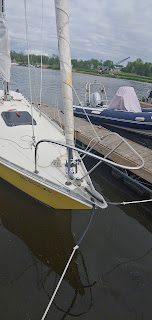
CDI Roller Fuller Installation
If you have been following along you know about our plans to install a roller furler aboard Woodstock, our Mirage 24. This process started last year when I purchased an old Schafer cable style furler. Unfortunately, I was not happy with the way it worked and felt it was unsafe. I mounted it inside of the forestay it rubbed up against the cable when furling and unfurling. So it simply did not work for my application.
I decided to go with the CDI FF4 furler. After looking at Harken, Schafer, and several other models it became clear that CDI has a great product at a fair price. It may not have all the bells and whistles some of the other systems have but they have a strong reputation and have been in business over 40 years, so parts should be available in the future. The flexible furler also appeals to me. Should I need to take the mast down there is a lot less chance of bending or breaking the foil components. One of the other big advantages of CDI is the self-contained halyard. This makes it so you can install the CDI with the mast up or down without a trip up the mast in a bosun chair. I installed mine while the mast was down but it is nice to have options.
The first step is to unroll the foil. This foil is flexible but don't let the word flexible fool you. The plastic used in this construction is pretty stiff. It comes to you in a wrapped coil that will spring open with significant force as you cut the tapes holding it. Take your time and be sure not to put your head in front to the coil as you cut tapes one by one. The next step is to wrap the foil back on itself in the opposite direction it arrived in the package. I was able to wrap it around my trailer on my own. Then wait. They recommend 3 or more hours depending on the ambient temperature. It was in the low 50's the day I did this.
Next step wait... ... ...
While waiting, I set up the roller drum anti-rotation bracket and the lower part of the turnbuckle. When the new forestay came, I checked the pin to pin length against the old one and marked the new turnbuckle with an industrial sharpie. These markers are great for writing on metal.
The only flaw I've found so far is that the CDI installation guide needs to be updated. I had thought I lost a part during the installation process or these pieces went somewhere else. I sent an email to CDI. Apparently step 8 in their guide refers to a discontinued part that is not necessary and I think these other parts go with the nylon bearing version mine is the roller bearing model.
With the furler drum ready I went back to check the foils progress.
At two and a half hours I still had a pretty significant bend at the top and bottom of the foil. I tipped it up on its side and went for a walk letting gravity do its thing for another half hour.
When I got back I marked the top of the foil and cut it with a fine blade hacksaw. Then I sanded the rough edges. I also labeled the halyard side of the foil for later.
The next step is to install the halyard and top cap onto the foil and tightened up the set screw. I really like this part of the system. It eliminates a bulky halyard swivel at the top of the mast as well as the need for a halyard retaining strap screwed into the mast.
With the foil cut to size, and assembled the next thing to do is slide it over the forestay.
With the foil installed I secured it to the mast with tape to keep it straight and waited for launch day.
One problem I ran into was the spinnaker halyard bail. I ended up coming back down later with a map gas torch, heating up the bail, and bending it to provide clearance for the foil head.
With the boat in I took the next step and installed the drum to the foil. First the inner drum and thrust washer.
Then the outer part of the drum is attached to the turnbuckle.
The inner part slides down into the outer and the foil height restriction pin goes in.
Some notes: the pin stops the foil from rubbing on the turnbuckle and when I set up the stabilization bracket, I offset it for my deck layout.
Next comes prepping for stepping the mast.
Up, Up and away.
Then the untangling process begins.
With the forestay attached, you can move the inner drum up and make adjustments to the turnbuckle as needed.
Next lower the inner drum back down the foil and lift the foil into position reinstalling the foil pin. Then tune in the rig side stays.
Next I put the main on and called it a night.
After work the following day, I ran a temporary furler line around the drum. The new one has been delayed due to Covid-19.
With the drum line run, I hoisted the genoa. The first time up I reached the bottom of the foil with the brass halyard stop before the sail was all the way up. I took a measurement to find out how much halyard needed to be taken off the top to even up the pull distance and brought it down to adjust the Halyard length. With the corrected halyard length, the sail went up all the way.
It rolls and unrolls perfectly.
With the furler finished I decided to check the clearance on the asymmetric spinnaker. It looks like lots of planning has paid off.


Comments
Post a Comment