Woodstock's Bimini Gets a Sunroof/Skylight
This winter I decided it was time to add that sunroof/skylight I've wanted since first installing the bimini on Woodstock. The bimini is the shade canvas over the cockpit. Its function is to keep the sun off the sailors on long trips, and it has been well worth it over the past few years. The only real problem with it is seeing the wind vane at the top of the mast. When we remade the canvas last year we discussed adding a window then but decided to hold off and make sure everything was fitted correctly. This decision allowed me to determine exactly how large a window as well as the proper location to install the window. The window needs to be positioned to allow the pilot to drive the boat and see the wind vane without having to yoga around the support poles and lifelines.
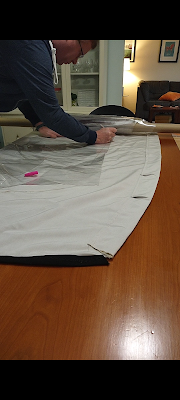
Before removing the bimini from the boat this fall I placed a few light marks with a sharpie to indicate where the window needs to fall. Using a T square I am tracing out the lines and transferring it so both sides are the same. Essentially I will be making a rectangular hole in this canvas for the window.
Next, I rolled out and cut the clear vinyl for the window.
I used the leftover edging trim and framed the window. This worked well but next time I might make the frame with the gray fabric to help hide the stitching better. I used white stitches so the top of the bimini would not show black stitching as a result you can see the white stitching on the frame.
With the Frame ready I cut a slit in the middle of the canvas so I can easily cut out the rest after the window is sewn in place.
Two-sided basting tape is used to position the window exactly into place.
Then it is off to the sewing machine. The first run is on the outer edge of the window trim.
With all for edges sewn down, It is time to flip it over and cut out the window.
When doing this I leave about a one-inch edge all the way around mitering each corner. My miters were a bit larger than necessary but it will all be covered up by the shade cover in the end.
The edge left around gets folded back under to leave a finished edge next to the window.
Then This edge is sewn down.
Next, I improved a rolling shade. This is a rectangle of fabric that will go over the window to block the sunlight when we are not using the window.
With the shade cut to size I hemmed all the edges.
Then it was time to take it to the garage for some hardware. I put a grommet in the back edge of the shade so it can be tied open.
The shade is then sewn to the back edge of the window.
I chose to use velcro to hold the shade in place when it is closed.
The velcro I used has a sticky back but I decided to sew each one on. To do this I had to use my sewing palm and a pair of pliers because the thickness of the fabric was just too much for my machine.
Here is a quick video of the final product in action.


Comments
Post a Comment