Posts

Genoa Sleeve by Sailrite

Image
  Another great project from Sailrite.  This is one of the more complicated projects I've done.  There is a little cutting, long sewing runs, and a bunch of hardware.  Sailrite has moved to a paperless model so study up on the  You Tube video first. Sailrite service is super.  On this project we had a miscommunication about the color of the fabric and Sailrite's service stepped right up and fixed it.   Measuring is the first step. There are two ways the fabric can be laid out depending on the diameter of the rolled furler. After the measuring it is time to get out the hot knife and cut. Sew Sew some more. Bam UV protection for your fore sail without a bulky cover on the edge of your sails.   Video Montage 1 Installed video.

Memorial Day Outing

Image
It was cold but totally worth it and it was good to be out on the lake again for the first time this year.  

Dyneema Life lines

Image
With the deck refinished it's time to turn my attention to the lifelines.  The lifelines currently on the boat are old plastic-coated, stainless lines, with swagged on fittings. There are a few spots that the plastic coating is wearing pretty thin so as part of the deck reface I decided it was time to replace them as well.  After looking around I decided to switch them out with Dyneema line.  I found a great source on ebay and picked up some 3/16th 12 strand-braided Dyneema with a 6100lbs breaking strength.  This is some great stuff to work with.  Eye splices are so much easier than in double braid lines. The hardest part of this project was finding a gate latch that worked well with my stern pulpit.  Overall I am very happy with the way these turned out and expect to get a lot of years out of them.   

Deck Refinish stage 2 Kiwi Grip

  Kiwi grip is some great stuff.  This is a latex-based paint that is back-rolled with a texturing roller. It is easy to clean up, easy to apply and leaves a great surface for your shoes to grip on. So far I am really happy with it.  The only drawback is bugs seem to like it. I suspect because it is latex paint it has a sweet smell that attracts the insects but I think it will dissipate after some time.  Kiwi grip photos via Tik Tok. 

Deck Paint Second Coat.

Image
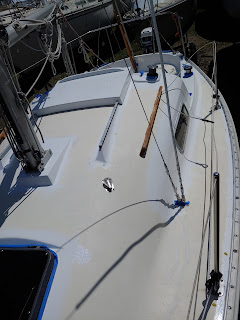
  Ezpoxy second coat.  For the record I don't recommend Ezpoxy.  It is hard to work with and I'm under-welmed by the results.  Regardless the second coat is on and it looks like it could use a third in some spots.   

Stage one 1st coat of paint.

Image
Stage one EzPoxy painting completed.  Today I got lucky and the weather cleared up and I got the first coat of paint on the deck and cockpit. Stage one is all the flatwork.  Stage 2 will be the non-skid.   

Rainy Day Blues

Image
Started getting ready to paint this weekend and then the sky got dark and it sprinkled on and off the rest of the day.