Posts

Winter Unveiling

Image
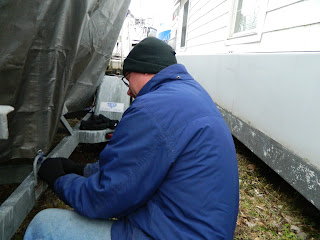
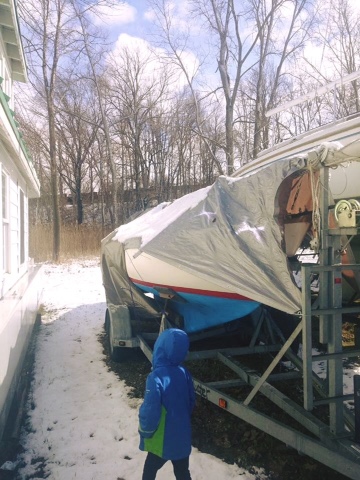
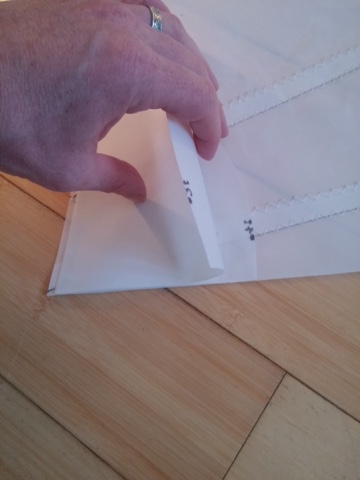
Time for the cover to come off.  Today we pulled the tarps, hopefully we are done with this snow stuff. Myles came down and helped.  6 year olds are cool.  He helped untie lines and load the support structures back into the car.  He even pulled the little tarp off the bow.   I was able to get in and open up the cabin.  I stored the cushions and sail aboard this winter.  I've never done this before but we were in the process of moving.  Everything was dry and in good shape and smelled like dryer sheets, which I had thrown down all over the inside of the boat to ward off animals.  Our total work time was about and hour before kiddo got too cold and we headed home for some grilled cheese and peep soup.  The boat looks good overall, a bit dusty and grimy but nothing a little soap and water followed up with by some wax won't fix. The smell of Dryer Sheets Pulling the last tarp off. Out of Chicken Noodle Soup.  How about Coco Peep Soup

Spring Where Did You Go?

Image
After a week of nearly 60 degree weather the plan for today was to go pull the cover off Kraken Up.  Then Mother Nature gave us a curve ball.  35 knot winds with one and a half inches of snow.  So instead of removing the cover we just brushed the snow of again.  Hopefully it will warm back up this week. 

Cape Dory Typhoon Genoa 3 wrapping it up

Image
Time for the hand sewing.  This is the stitch by stitch stuff that adds real strength to the pressure points on the sail.  For this, sailrite has sent along wax coated Dacron thread and a sail makers needle.  The needle is like a tiny bayonet.  Three sides and super sharp, poking yourself and you're sure to bleed a bit. I use a few other tools when doing this. One of them, is my trusty sewing awl.  This is a must have in my opinion.  I'm sure you could get by with a regular awl, but this thing makes punching through finishing leather, nylon strapping and six layers of Dacron a bit easier.   I didn't bend the needle,  it came curved.  I suspect this little curve adds some strength or at least takes direct pressure off the shaft of the needle as you jam it into something hard. This is a thick brass thimble.  Last sail I made I punched right through a little tin one and into my hand. I'm not making that mistake again.  Most of the time I actually sti

Off Sailing in February

Image
DN 241  Kraken ICE! There has been a break here in the sewing action on the Genoa for some sailing.  Yes the ice the weather, the work schedule all fell into place here for the perfect sailing weekend. Wow and did we sail about 6 hours out on the ice between Saturday and Sunday.  My brother and I zipped up and down the lake and 40+MPH trading boats back and forth from time to time. If you have never ice boated before it is a wholly different experience than soft water sailing.  First off you're going fast, you defiantly don't want to flip so your a little more likely to ease off the sheet line sooner, and the ride can be a bit more chattery although, the ice today was in very good condition.  That said I'm a bit sore after two days of sailing.  We sailed two different kinds of boats this weekend, my DN  and my Dad's Skimmer.  The DN is clearly the dominate speed boat in this pair off but the Skimmer has a much more cushioned ride which was nice after ridding the

Cape Dory Typhoon Genoa part 2

Image
I've been chugging away on the Genoa project bit by bit here.  So I'm throwing up some more photos of the project. Corner reinforcement patches. Equal lots of layers. I use my basting tape sparingly, placing it so it is some what off center.  This way I will not have to sew through it.  I figure 4 or five layers of tape could really add up and I don't need any more layers to sew through.  Each corner's vertex is six layers of Dacron thick.  Once I got all the layers on, I drew some light lines on the top patch so I could see where to sew.  This will secure the whole patch. The clew is one of the most complicated assembly's.  To start, I cut and melt the nylon strapping to the right size. The clew will have a steel ring embedded into the corner.  The first step is to cut out a space for the ring.  I recommend sharp scissors.  See earlier (6 layers). It actually cuts pretty easily. The next thing I do is lay out my straps and bast them into place along the foot and le