Posts

Cape Dory Typhoon Genoa part 2

Image
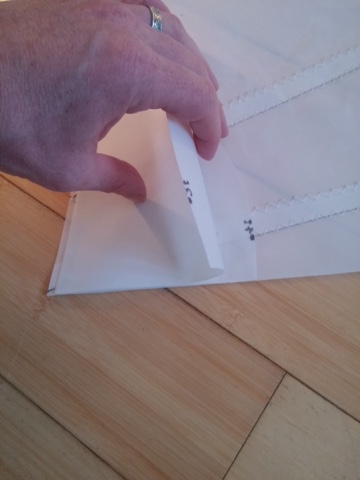
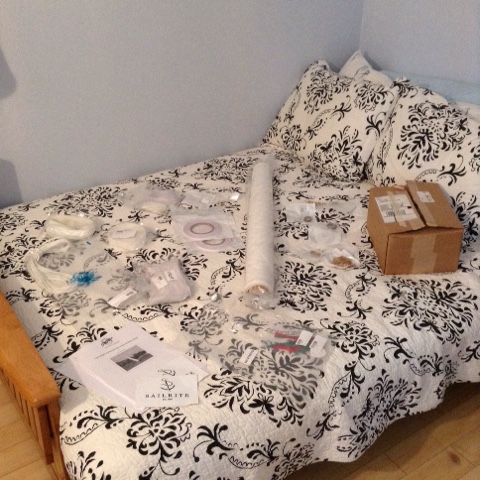
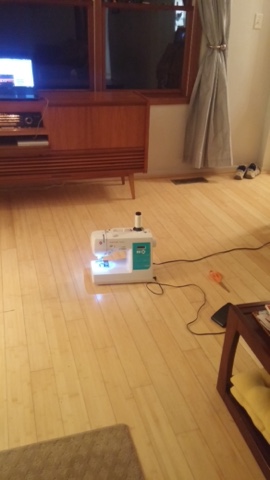
I've been chugging away on the Genoa project bit by bit here.  So I'm throwing up some more photos of the project. Corner reinforcement patches. Equal lots of layers. I use my basting tape sparingly, placing it so it is some what off center.  This way I will not have to sew through it.  I figure 4 or five layers of tape could really add up and I don't need any more layers to sew through.  Each corner's vertex is six layers of Dacron thick.  Once I got all the layers on, I drew some light lines on the top patch so I could see where to sew.  This will secure the whole patch. The clew is one of the most complicated assembly's.  To start, I cut and melt the nylon strapping to the right size. The clew will have a steel ring embedded into the corner.  The first step is to cut out a space for the ring.  I recommend sharp scissors.  See earlier (6 layers). It actually cuts pretty easily. The next thing I do is lay out my straps and bast them into place along the foot and le

Cape Dory Typhoon Genoa Project

Image
Today, I started sewing up a new Genoa for Kraken .  This summer, I patched and taped the old Genoa several times.  It is ripping down the luff seam, the foot seam and it is pretty thin in several other spots so it is well past time for the old sail to be retired.  I believe the Genoa may have come with the boat in 1978.  Happy birthday to me and the boat; at 38 years, we are the same age.   This is my second sailrite sail. A few years ago, I built a working jib. Here's a link to that project.  The previous owner built a main and a storm.  So this will fill out the sail inventory with all sailrite sails.   Over the last few weeks I've been working on getting a sewing machine fixed and tuned up.  It has been interesting as I have pulled apart and checked the timing on my machine. I even made a few modifications to beef it up a bit and allow for some extra clearance at the base plate.  Friday the kit from sailrite arrived! This was super fast I did not expect it to even

More uses for those sail scraps

Image
A Dacron Tooth Fairy Pillow for the kids first loose tooth.  This way the tooth fairy can easily find the tooth in the dark.

Snow Finally and a Little Disco Dune Sledding

Image
Today we got our first real snow of the winter.  We have had a few splatters here and there but today we got slammed; schools closed businesses closing early. I got down to the marina and took a few pictures this afternoon once the roads were starting to clear up.  Truth told it was still pretty ugly out there.  The express way must be closed because a ton of truck traffic was coming through town.  Regardless the effort was worth it. Kraken is holding up well under her cover and the supports under the tarp are holding up well.   I peeked my phone in for a few quick photos.  Nice and dry! We also got out and hit the dunes for a little sledding.  Myles helped me edit a video so we added it in here at the bottom just for some fun.  Wow is it windy down by the lake. Small Light House at the Marina Frosty Boat Yard Frosty blanket Cold but Dry Inside

Winter Warmth

Image
It has not really snowed here yet and it has not been cold enough to freeze the lakes over for ice boating. All it has really done for the last month is rain. So I decided to start a sewing project. Anticipating a colder January and February, I've decided to convert one of my old main sails into a blanket.  I tried to sell it on ebay a while back but it is still here may as well put it to good use. BB and my mother also grabbed some of the old sail fabric a few weeks ago and created a set of curtains for our guest bedroom.   I started by setting up the sewing machine in my traditional layout on the big living room floor. Laying out the sail I used basting tape to hold the Dacron to a piece of light blue polar fleece. Let the sewing begin.  I had a good run going when the first jam happened this little singer sewing machine just couldn't feed the fleece through and kept jamming.  I figured out after a few tries that if I ran the Dacron on the bottom and th

Final Close Up for the Winter

Image
This weekend I went down to the boat, pulled off the last of the gear, and put in the rest of the mast braces for winter. This year, I figured out that my bar clamps work really nicely for rafters.  To bad I only have 3 of them so I used a few other boards and scraps I have laying around.    Rafter Clamp Brace              Plastic molding arch over the hatch Aft mast supports I have found it important to  be sure to clean out the drain holes along the toe rails.  Little leaves like these can clog them up and allow water/and ice to build up on the deck.  Finally, I cover it all up with a tarp or two Tarp off Rear view covered Final cover up note the bar clamp sticking out.

Simple boat simple motor

Image
I've been watching the big boats all around the marina.  The boat yard is a bustle with activity once again as everyone pulls their boats to winterize for the season.   The Typoon remains so easy.  Last weekend I winterized my motor in under 10 minutes.  I drained the gear lube and refilled it with fresh lube for the spring.  Fogged the 1 cylinder and poured a bit of fuel stabilizer into the tank.  Fast easy simple.  I still need to get the tarp over the cockpit but I've been on and off the boat a few times getting measurements for a few winter projects to come.   I have to put the kitchen back together in this new house first.  Love the thrill that has come with moving to a new home but it is taking away from the boat time.