Posts

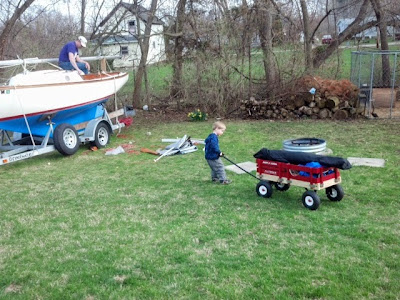
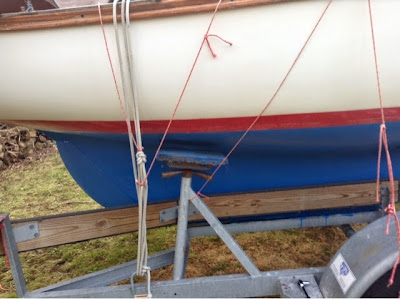
Second outing, first sail!

Image
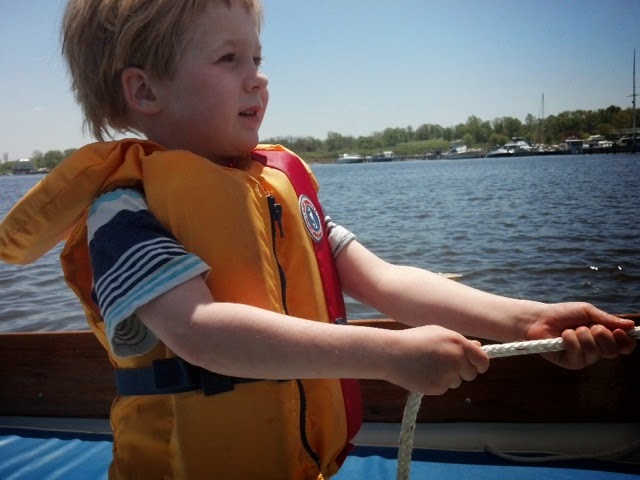
So Memorial Day weekend is upon us.  The weather here in Michigan could not be better.  The last two days we have had crystal clear skies and temps in the upper 70's. T ime to hit the lake.  Over the past week more navigational markers have shown up in the lake and things are looking great. The channels are marked very well this year.  We set of from our dock and had a great time zig zagging around.   We were out and about for about 2 hours today and saw many of the great sites here on Lake Kalamazoo.  The river paddle boat came through the lake, we even saw the duck boat today.   The Anex patio was open although no live music was coming from there just yet, it was early in the day.  Myles was super today he pulled up the jib halyard. Cleating  Under way. Oh no we are out of snacks!  Time to head home.    

Weight ratios

Image
So I went down this weekend to clean up and finish setting up for the season.  I pulled lots of stuff off the boat that won't stay on board all year and also moved several things around, generally straightening up.  One of the big things I moved was the anchor.  I've always kept the anchor in the front compartment under the V-berth.  For this season I've moved it to the back of the boat.  You can see the difference this makes at the water line in the picture below.  I'm hoping moving the anchor will make entering and leaving the dock easier.  With the anchor in the front we keep running into a problem.  As we go forward to through off the bow lines our weight pushes down the bow and pulls the motor out of the water. The Gurgle gurgle of the motor just adds stress to the whole departure that does not need to be there.  This seems to have helped our problem although we may need to eat a few less Big Macs if we want to solve it entirely.  Weight distribution on a small sa

Main sail rigging

Image
This post is a quick reference for rigging the main sail of a Cape Dory Typhoon.  Each boat over time has different modifications made to it based on the skippers preferences so your boat may not be exactly like this one.  However this is how I put mine together. I   first start with tuning the mast in.  I like to have a bit of rake in the mast and to be sure that it is in column.   Next I slide the booms goose neck into the mast. I slide the boom down to the sail stop and make sure it is tight with a screw driver. Then I clip the back side of the boom to the back stay catch. After that I get to work on untwisting the main sheet.   My current main sheet set up goes something like this.  It is a bit of a variation from the original set up.  You can see I still use one of the original Schafer stand up blocks to guide the sheet line to the cam cleat but the Harken fiddle block does most of the heavy lifting here.  Later this season I'm hopping to switch this system out for a traveler.

Loading up and Rolling out.

Image
Myles and his wagon were a big help this Friday as we loaded all the gear into the boat.  After several trips around the backyard we got all the equipment, sails, and cushions aboard.   This winter we sold our station wagon for a more fuel efficient vehicle.  The wagon was a great car for pulling the Typhoon but the mpg was killing us.  Saturday morning we rented a truck from U-haul to pull the boat back to the marina.  After millage it came out to 52 bucks for the day.  Not bad, we easily make the rental cost up in fuel savings in just one week of driving back and forth to work.  After mounting up the engine, filling the tires with air and checking the tie downs we were off. Once down at the marina we popped the mast up and the boat was ready for launch.  We haven't had to many warm dry days so I did not get a coat of varnish on the teak.  I'd hoped varnish before launching but that does not look like it will be the happening, because splash time

Hover craft and greasy winches.

Image
It's always a bit funny to see my Typhoon hovering in the air as I lower the trailer bunks to paint under them.  The boat shifts slightly as she settles on the keel.  I lower two bunks at a time and paint under them. Then wait an hour or so put them back then lower the other two.  The end result is a nicely finished bottom ready for another season in the water. Winches:  click click click....  What you should not be hearing when pulling a line around your winch.   I pulled my winches apart for their annual lubing.  To do this I use a star bit on my ratchet, a pair of gloves, a grease gun, rags, and a plastic bag to contain the mess. As you pull out the screw be sure not to lose the bronze washer/spacer plate.  This is one of those things that could easily go plop into the lake.  My boat is actually missing one.  The winch still works perfectly fine if you lose it, but it has a bit more play in the top plate. One of these days I'll have to find a repla

Throw Back Thursday

Image
Throw back Thursday has been coming up all over the place and my younger cousin found these old pictures of my Uncle's Cape Dory Typhoon.  This particular day was a great family adventure.  His boat was on a wood cradle on top of a old farm trailer.  I remember the tires on the trailer were thread bare and bald and it was a fairly tall trailer for hauling a boat..  On this day, my Uncle decided to ramp-launch his Typhoon using my Grandfather's farm truck.  Check out the progression of things here.  Oh yeah, and that's me in photo 4 on the left with the Top Gun aviator frames oh yeah the 80's Backing up disconnect Align and re-hook/put the drop pin back in. Back up. Back in some more.  Maybe Sterling State park needed steeper ramps? End result? A launched boat and clean truck. I remember when my Dad opened the door after pulling out, the water rushed out of the truck. Also, my grandfather was not to thrilled to have his floor boards cleaned

Sea Cocks and motor mount 2 and brr.

Image
Bronze looks great all cleaned up and shinny, b ut I have to draw the line some where.  This is it.  I will not be polishing these but maintence is a must.   My Typhoon has two Groco sea cocks.  They work very well but need some annual attention.   To pull them apart it is pretty straight forward.  A small socket on a ratchet and the bolts pop right out.       Mine usually come right apart with a little wiggling.  However if they get stuck you can twist in the preasure plate adjustment to push out the valve body. When you pull out the valve body a bronze preasure plate should also come out.  Inspect all the pieces.    Next I turn the preasure plate adjustment knob all the way in and spray lube into the housing.  I'm using white lithium grease.  All the articles I've read say to stay away from petroleum based lubes.      Next I lube up the the remainder of the pieces and reassemble.   First twist out the preas